C

C

"I do believe in an everyday sort of magic...the inexplicable connectedness we sometimes experience with places, people, works of art and the like; the eerie appropriateness of moments of synchronicity; the whispered voice, the hidden presence, when we think we're alone." Charles de Lint

Showing posts sorted by relevance for query queen. Sort by date Show all posts

Tuesday, November 14, 2023

Nests

I finished this fabulous puzzle today....and have already passed it onto Patsy and her husband Brian to enjoy.

I loved every minute of this one!  Do I say that every time?  But I really really mean it this time.

 The little nooks were full of colorful curiosities...including this little nest.
Speaking of nests....did you know that Queen Anne's Lace forms a nest?

There was always Queen Anne's Lace along the roadside where I grew up.  

I've posted this photo several times with the farm I grew up on in Wisconsin there on the horizon....and the Queen Anne's Lace along Fox Road.


I watched this clump of queen Anne's lace all summer long on one of our walking routes here in Portland.

And I loved all the stages.

On the other side of the sidewalk there's a field with other wildflowers including black-eyed Susan. It's takes me right back to the Wisconsin roadsides.

I think the flowers are delicate and delightful.


As the flowers finish blooming they curl inward to form a little nest....eventually drying into a brown ball of seed heads.  I took this photo back in August.


I found this photo online...it really shows the nest and the beautiful seeds.


Why am I writing about this now?  I picked this dried Queen Anne's Lace flower head this morning on our walk....and you can still see the nest shape.
Still celebrating Seed Season!

Sunday, December 31, 2017

Queen?

Happy New Year! I'm excited about 2018!

I love my new studio in Maine....when I'm there I feel like a queen. When we were looking for a place and we walked into this room Paul was sold. It was the kind of space he always wanted me to have....and the kind of space I dreamed of.

I brought some artwork up from Lexington....including a couple of cross stitches. One was made by my friend Patsy which confirms it....I'm a crafting queen. The other one, however, suggests that I'm a little wild and wacky.


I did have fun putting this wild and wacky bulletin board wall together....full of colors and snippets....all gathered over time. Several artists are represented here and I'll probably point things out over a few posts....but a favorite item is Connie's watercolor paint pallet at the bottom. And her white console underneath is just perfect. Margie...do you see the handmade gift tags you gave me a while back?


Sunday, January 11, 2015

My Cathedral Window Quilt

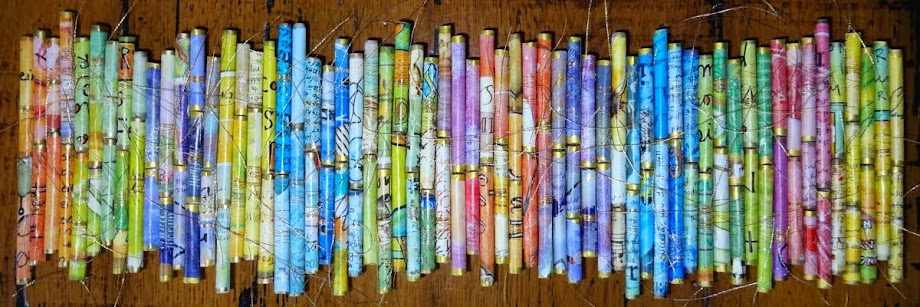
    ...it matches the paper tubes!


During one of our "girls' weekends" my friend Patsy taught me how to make a cathedral window quilt.  I am 8 1/2 years in...maybe I have too many hobbies.  She had already taught our other buddies, Jane and Janice, and I wanted in.  Patsy is on her 5th and Jane is on her 3rd. Meanwhile Janice and I keep plugging along on our first.  I don't work on it as often as I should at home because it's one of my "take-a-long" projects. Because it's all hand done it's very portable. I can carry a small container with what I need to make the white squares in the car, on a plane or sitting having tea with my stitching buddies.  So, much of the time it sits in the container.  Maybe this will get me going...or I just need to travel more.

It starts with a 6 inch square of muslin that gets folded in kind of a crazy way and tacked by hand.  This was difficult to start...but got easier.


The folded squares get hand-stitched together.  Some people make the quilt in even rows but Patsy taught us to work diagonally....giving it a really cool edge. This will make more sense when you see the picture below.   I started in the corner.  My friends started with the middle diagonal row of 49. (for a queen size)  I couldn't face that long row at the start.


Next is the fun part...adding colors. The small squares of colors get set into the muslin and the folded edges get turned back and hand stitched.

I am sure there are way better instructions available...or you can just call Patsy.  Just kidding.  Let me know and I can try.


The first row is one square.  The second row is three....and the next will be five....and on and on and on.


Every row of white squares allows for two rows of colors....in the row itself, and where the rows meet.  I really enjoy the process of picking the colors for the next row.


   Here is where I am 8 1/2 years later.


The longest row on the left half has 31 white squares.  I got this far and worried that I would die before I finished so Patsy suggested I start the other half.  When I get it the same size I can either join them and have a wall hanging or keep going on each until they are big enough to join to fit a bed.  For a queen size the middle row needs to be about 49 squares. (this depends on the size of the square you start with)  I think it would be beautiful hanging on the wall instead of a headboard...just saying!

Notice the funky pointy edge that you get by working diagonally.


I am adding the little beads
all the way around...just because.

One of the nice things about this quilt
is when it's done it's done....kind of a
quilt as you go.  And, because of all the layers it's quite hefty.

Stay tuned.


My Maine (pun intended)
stitching buddies:
Patsy, Jane, me (MaryAnn)
and Janice.

Monday, June 4, 2018

Colorful Queen

Like I said....some days you have to look a little harder to find a
little joy.  But what's not to love about a colorful queen that comes
across your Pinterst feed. She certainly knows what she likes.


Then I got curious and did a little Pinterest search and discovered that sometimes she's downright jazzy.  Yup....sometimes you have to look a little harder...but you can always find something.


Thursday, June 30, 2022

Bolting

When I was in Wisconsin I heard the word "bolting" used in the context of gardening for the first time. I've always known it as "going to seed"....but now I have a new name for it. When vegetables and herbs go to seed...or bolt....their food source season is over and they begin the process of reproducing.  

https://www.towergarden.com/blog.read.html/en/2015/7/bolting_basics_how.html

I haven't had a home with enough sun for a vegetable garden in a long time...so bolting has been off my radar screen.  But when I came home from Wisconsin I now know that's exactly what happened to my little salad garden that Janice gave me....the sudden vertical growth and flowering of the lettuce plants. I learned from the article above that the tiny flowers from bolting are loved by pollinators....so I composted it a little too soon.

And today....while visiting Janice....I got the whole "bolting" experience with her cilantro....and it was sight to behold.

This is a cilantro bloom....getting ready to make some seeds.  It's quite delicate and lovely...the bees will be happy!  

It was a beautiful summer scene.... the blue sky and the lacy dill in the background....
and the mass of bolted cilantro in the front. 


Here are a few more things I loved from Janice's house.

Look at the holes in the petals of the rose.  So interesting!

And I loved this hairy Queen Anne's lace bud.


And finally...I'm not the only one who loves watching blooms dry.  Janice had a whole bouquet of drying allium blooms.  It looks like a little firework bolt....pun intended. (is that even a thing? It is now.)

Saturday, July 20, 2024

Dreamy Quality

I continue my fascination with Queen Anne's lace.....it's everywhere right now. I love all the pieces and parts...and all of the stages. 

Sometimes...but not always...there's a hint of pink on the new blooms. 


I planted this fuschia for the hummingbirds...but I think it's a little hard for them to get to the flower because it faces downward like a long trumpet. But hummingbirds are small....and they find a way.

The blooms are so delicate and the long buds so delightful. 


I took a selfie from the hummingbirds point of view....and I was most excited about the way the trees in the background photographed. 

They have a dreamy quality....with the little bubbles of light.

Wednesday, January 24, 2018

Oddly Satisfying

I don't think I'll ever stop picking up interesting and colorful objects I find out there in the world. And everyone once in a while Paul comes home with a special little something he found to add to my collection....he knows me well.

A few days ago he brought home these sweet little baby scissors he found on his way home from work. They're cute as a button and a perfect addition to the jar.


Since I'm the queen of distraction I spent a few minutes today assessing the contents of my jar.  There are several new treasures since the Consciously Creative Class....like the little crown and the Christmas bulbs and most of the orbs.  I find this little collection oddly satisfying....and at some point I'm going to need a bigger jar.


Sunday, May 28, 2017

Operation Smother

This is a garden project post and it's a little long.  But it's where a big chunk of my creative energy has gone recently so deserved a place here on the blog. It wasn't really a "joyful puttering" project...it was more of a mission.  If you're interested....read on.  If not...enjoy the day!

I have lived in this house in Lexington, the Hancock Church parsonage, for 8 years. It's a great house and Paul and I are very happy here.  
I inherited a large neglected garden in the back yard filled with several invasive plants and one kind of ordinary hosta.  I have been reinventing one end closest to the house over the years...weeding out the garlic mustard, lily of the valley, and wild onion and adding a variety of hosta and other shade loving plants. I change it up a little every year. 

This photo below is from last year a little later in the season...but I wanted to set the stage for the project. The ferns that you can see in the middle of the photo on the left are the line. My reinvented garden is on this side of the ferns....the ordinary hosta, lily of the valley, and violets etc are on the other side. All these years I have let the back side do whatever it wanted to do.  


Last summer I gave a woman walking by a tour of the yard. The first thing she said when she saw my back garden was..."oh my you have bishop's weed." If you look back at the photo above...it's blooming right behind the ferns.....you have to look closely.

I had no idea it was yet another invasive plant I inherited.  It wasn't bad looking....it actually had a lovely bloom that looked a lot like Queen Anne's Lace. It was in the back 1/2 of the garden so I didn't worry too much about it.


But  this spring I noticed that it was coming in very thick...and moving vigorously into my tended space. Something had to be done! After doing some research online I collected my materials and "OPERATION SMOTHER" began.

I'm showing the end of my project first...because many times during this process I wondered "WHAT WAS I THINKING!" But for the most part it's done and I'm OK with the result. It's environmentally friendly and...other than being a lot of work it didn't cost anything.


To start with I collected lots of cardboard and newspaper....thanks Linda and Janet for contributing. I marked off the area and had it all weed wacked right down to the ground. The area to the right of the cardboard I will hand dig and keep cleaning up throughout the spring and summer.

I used a smothering technique I learned from a landscaper in Maine that you can read about here.  I covered the ground with cardboard then a thick layer of wet newspaper then a layer of mulch. Do you see why I didn't lead with this photo? It looks pretty sad and hopeless.

Over several days I got 4 car loads of ugly chunky wood chips free from the town transfer facility. You can't shovel this stuff....and a pitch fork only sort of works. But I persisted.

I'm getting there. 

I hated the way the wood chips looked. But lucky for me I had a pile of better looking hemlock mulch in the way back of my yard  left over from several years ago.  I covered the wood chips and it looks much better.

My plan is to let this sit for a year or two and hopefully smother the weed.  At that point I'll plant some sort of shrub or understory tree keeping it simple and heavily mulched. Any sign of it on either side I will tackle by hand.  It may seem kind of stark...but it's really not bad in person. My view from the patio is just as nice as it's ever been.  


I had just finished the project when I took this photo...dirty knees and all.  There's something very satisfying about completing a large, manual labor project. Maybe it's my inner farm girl coming out. I think "operation smother" was a success. but I can see from this photo that I need to clean my patio stones. Oy!


This is what it looks like from the edge of the mulch back right now. The ordinary hosta is growing...and the way back is full of violets and lily of the valley and my compost bin.  I'm still going to leave this part alone for a while...and just try and keep the bishop's weed out as I see it. Maybe someday I'll smother this too.